


screenprinting

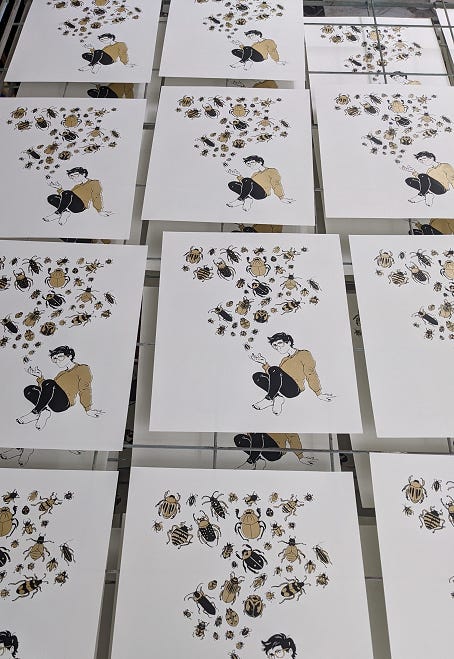
In my Publication Workshop class at CCS, we learned how to use the screenprinting lab! Our assignment was to screenprint a two-color “profile picture” (very open to interpretation), and since I’d been doodling bugs in my sketchbook that week anyway, I reappropriated them for the assignment. (I reappropriated the drawing of myself too, gold star if you recognize it from the depths of social media.) Work smarter not harder, amirite.

But it had to be two colors! So here it is with a second color. Each color in a design has to be printed separately as its own layer on the paper, with time for the ink to dry in between printing sessions.

I’ve done lots of screenprinting over the years, but only the low-tech kind where you use an x-acto knife to cut your design out of a piece of paper, tape it to your screen, and squeegee ink through it. It works, but the paper breaks down pretty fast so you can usually only get maaaybe ten prints out of a single stencil before it starts disintegrating and bleeding ink everywhere, and you have to throw it away and cut a whole new stencil. In addition to the Sogginess Problem, there are significant design limitations to working with paper stencils, so I was pretty excited to get to learn a new, higher-tech type of screenprinting.
The kind of screenprinting I did for this assignment is Legit Screenprinting, where you use a photosensitive emulsion fluid to coat your screen and then burn your design into the emulsion. Since your stencil is made of hardened emulsion fluid instead of paper, you can print with it pretty indefinitely, maintaining the fidelity of your design. It’s very cool! But it also takes WAY longer because there are SO. MAnY. STEPS (and a lot of waiting for things to dry in between steps). This also means there are more points in the process where things can go wrong. I had to reburn the linework layer of my design three times before I got it crisp enough to print. I was definitely glad I started this assignment over a week before it was due!

poll: is this a.) peanut butter or b.) gold ink
This was actually a pretty ambitious design for a first crack at screenprinting, because my linework was so fine that there wasn’t much margin for error with the registration. (Quick vocab lesson: “Registration” is the alignment of overlapping elements in the printing process, and “misregistration” is when things don’t line up quite right.)
Here are all my prints on the drying rack, after I’d done my second layer of ink (the black linework). In my opinion, misregistration is part of the charm of screenprinting, and even my prints that came out a little misaligned still look pretty dang cool.
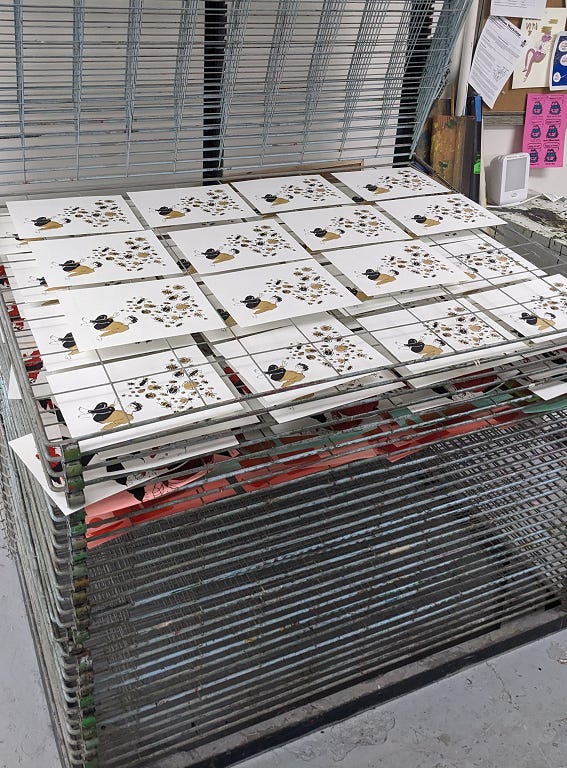
There are 45 of these on the drying rack, for those of you counting at home.
They are shinier in real life, trust me on this.

It’s not perfect, but for such a challenging design, and for my first time, I’m pretty pleased with it!
Now, uh… what do I do with the extra 28 prints of Bug Tornado Maia 😅
Um, please sell the extra prints, because I will totally buy one 😁
That is amazing art! I love it. And, you could totally sell the extra prints. People would definitely buy them!